So
you like the look of a fine wooden base for your model, but you don’t want
to drop the scratch on a finished base. That’s fine. With a small investment
and a little elbow grease you can have nice looking wooden bases.
To
make this even easier on you, I will assume that somewhere in your general
area you will have some sort of craft store like Michael’s, The Rag Shop,
etc. If you had to cut the boards yourself you’d need a router and a lot
more sanding time. That is what we are trying to avoid here. So, to get
started take a trip to the craft store. Find where they keep their bases and
take your time picking some out. The nicer the cut of the wood, the easier it
will be on you later on. These usually run under $1 each in the craft stores!
WHAT
TO LOOK FOR:
A GOOD cut! If two sides are rough (even the round ones can and will have two
rough sides) that means more sanding. Bases
with an interesting grain that will look good once stained. Bases that feel
HEAVIER are great because it might be a denser wood and will accept your work
very nicely. Avoid warped bases, major dents and other damage, rough cuts, and
splintering wood. These will only hinder you later on.
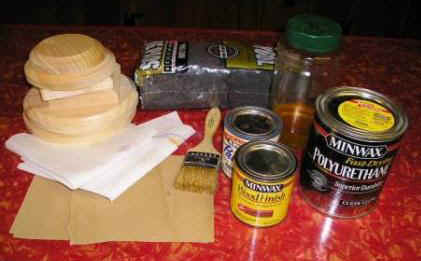
SUPPLIES:
Various woodstains, polyurethane, various sandpapers, various grains of steel
wool, 1 or 2 inch bristle paintbrushes, paper towels.
So
you’ve gathered up your supplies. You probably have some of this already and
can get going for less than $10. Time to get to work. Grab a base. Inspect it.
Run your fingers all around it. You WILL notice some rough spots. So dig out
your sand paper and get to work. Try to smooth it out as best you can. Since
these are usually a fairly soft wood, you may never get it smooth at this
point, but that’s alright. You can fix it up later.

Sanding
the rough sides.
When
you are satisfied with the surface of the wood, the next step is stain. I like
the darker colors like English Chestnut. Also I prefer the oil-based line by
Minwax, as opposed to their water-based line. It just seems to penetrate
better and the color is richer.
NOTE:
Don’t be fooled by the ones that say it’s stain and clear gloss
combined, it NEVER turns out glossy… EVER!
Massaging
in the stain.
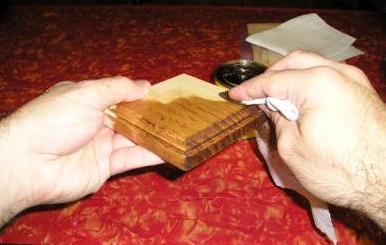
Crack open your can of stain and
dunk in your paper towel or rag and massage the stain into the wood evenly. If
you feel like you might’ve used too much stain you can rub the wood with a
clean towel to soak up some of the stain. I like to use a towel because I feel
that I have more control over the effect of the stain. When you put it on with
a brush, it can all soak in before you have a chance to start wiping it off
and you can end up turning your base black and featureless quickly. HOWEVER,
if you had any rough sides on your base, they WILL turn black with the stain.
Don’t worry about it. You can still fix that later.

Applying
the polyurethane.

Sanding
down those dark areas.
Steel
wool the surface smooth.
I like to let the wood sit for a
little while before applying the first coat of polyurethane. Minwax suggests 8
hours, but I think you can get away with less if you don’t use a lot of
stain. I prefer the gloss finishes on wood, so I get the Minwax Gloss Finish.
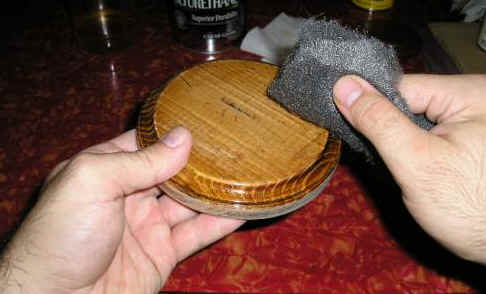
Apply a nice even coat of polyurethane and allow at least a day to dry. This
is the point when you get to fix up those areas that became too dark while in
the staining process. With a fairly fine sandpaper you must now smooth out
those dark areas, as well as sand the entire surface of the base. Don’t
worry if you sand through the stained wood, you can easily re-apply more stain
to those areas. Steel wool the base until it’s smooth. Now you should have a
pretty uniform finish on all the surfaces and it’s time for your second coat
of polyurethane. Once dry, evaluate how it turned out. More than likely you
will need at least one more coat of polyurethane to attain the best finish. If
you think it leaves more to be desired, feel free to sand and polyurethane as
many time as you see fit until you get the level of gloss that you want. I
usually put down about four coats before considering it done. At that point
you will have a professional looking base that probably cost you less than a
dollar in materials to make.
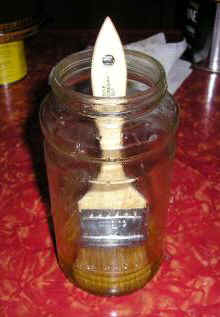
Don’t
forget to clean your brush. Soak it in Lacquer thinner and wipe it clean.
Don’t leave it in too long, it’ll dry out the bristles and they will begin
falling out prematurely.
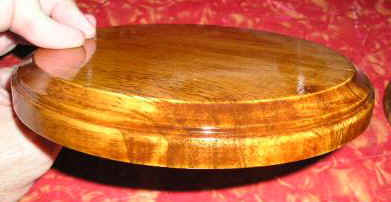
The
finished product. After four rounds of sanding and coating this base has a
rich color and deep shine!
Good
luck!
This
is from the September, 2004 Issue of the BPMS Bulletin.
If
you liked this, we have lots of useful clinics at the Brooklyn Plastic
Modelers Society all the time. For meeting information please check out our
webpage:
BPMS