Games Workshop Stormtalon - FINISHED with pictures!

HARDWARE MODELING! With a focus on Sci-Fi, Fantasy, and Concept Vehicle and Hardware subjects, including props, robots and automata

Moderators: tay666, Moderators

Post Reply
Message
Author
User avatar
DefiantWorkshop
Registered Seller
Registered Seller
Posts: 1517
Joined: April 6th, 2004, 4:30 pm

Games Workshop Stormtalon - FINISHED with pictures!

#1 Post by DefiantWorkshop »

While technically a "miniature," I felt this was more in the "scif-fi plastic" category as a vehicle. Feel free to move if need be.

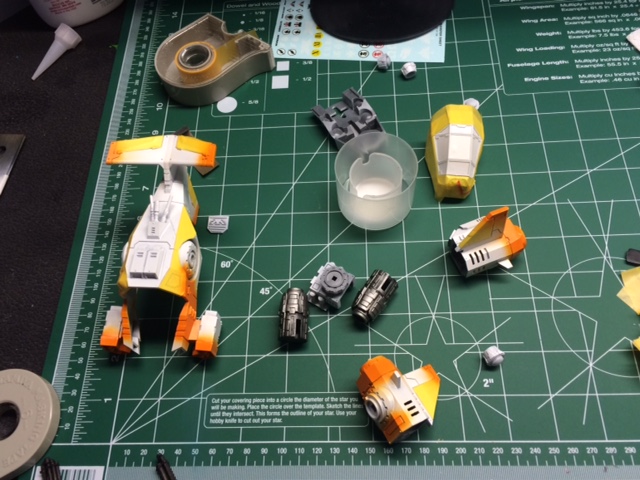
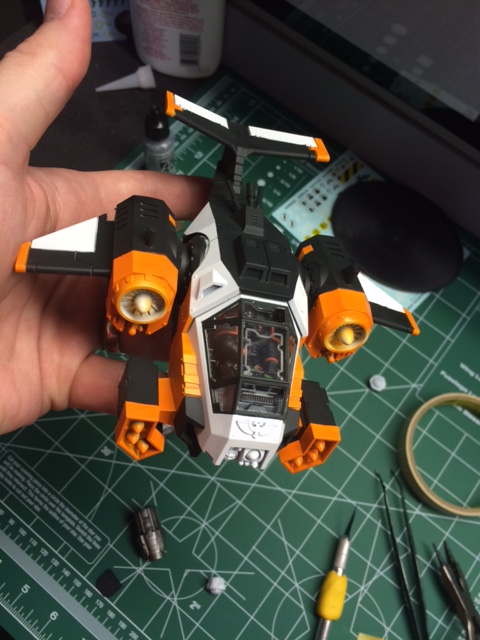
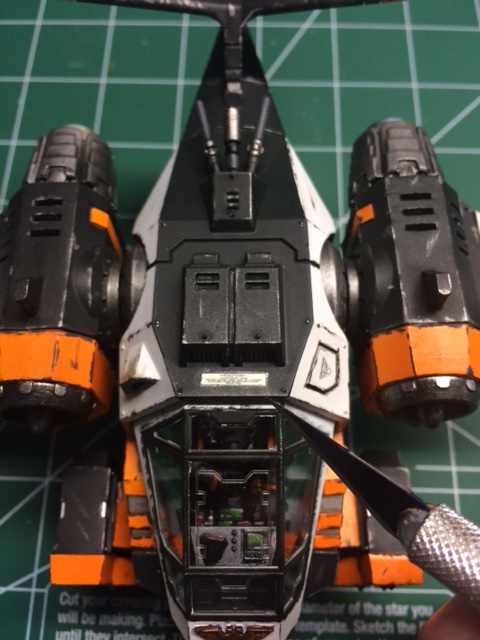
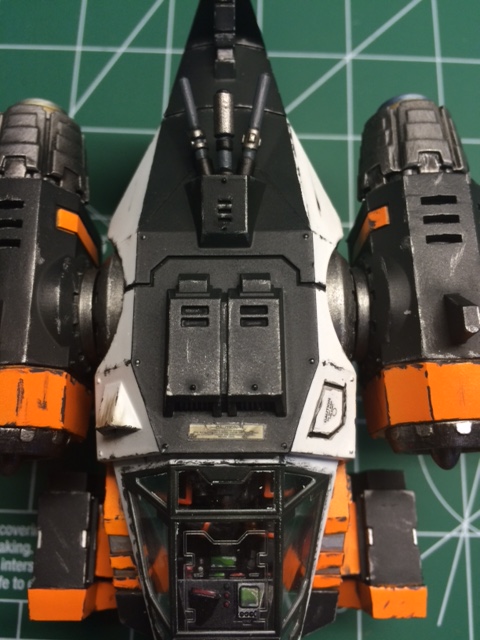
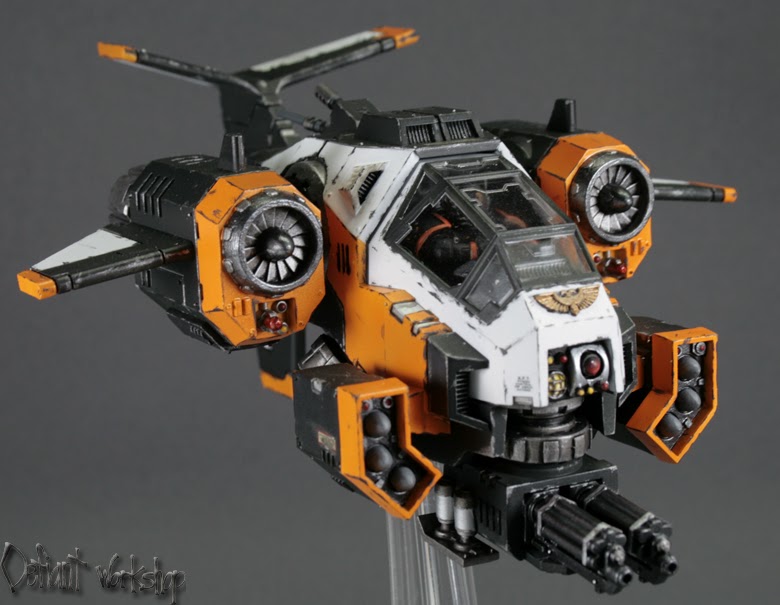
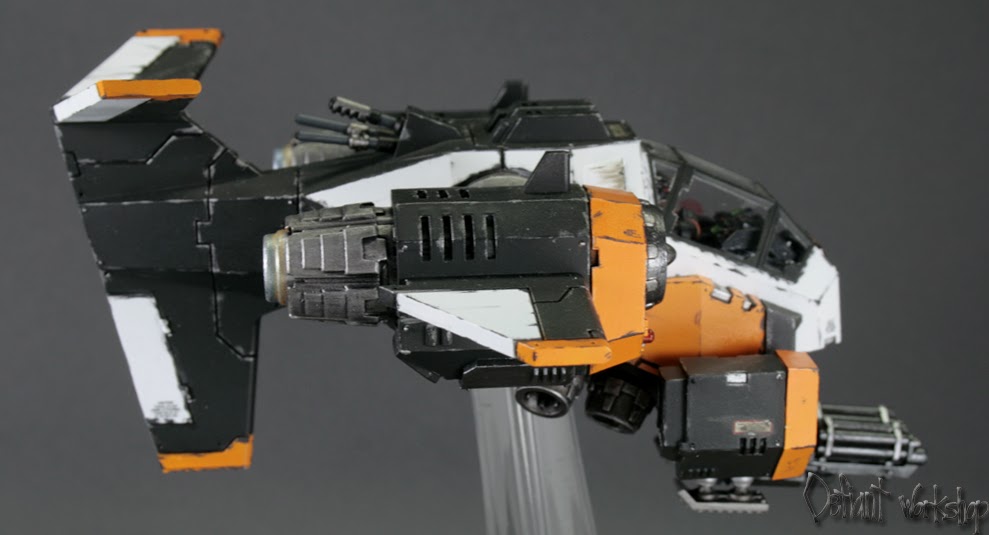
Decided to start on the Stormtalon because I really wanted to try a specific color scheme. I was actually going to do it on my Tau Devilfish, but changed the scheme once I saw how the camo was turning out. So the basic idea is to build this in larger sub assemblies. I've clipped most pieces off the sprue and discovered that masking this when complete will be near impossible, and it actually builds quite nicely on a modular level. First problem with that, though, was the engine/wing area. The turbines are quite detailed, and wedge into the "wing" (for lack of a better term) area, that then ALSO needs to be glued together. That wouldn't work, so to operate the way I need to, I had to operate:

Image

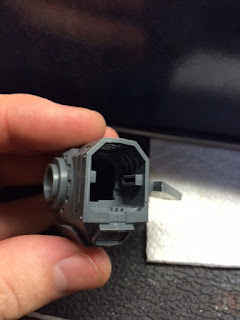
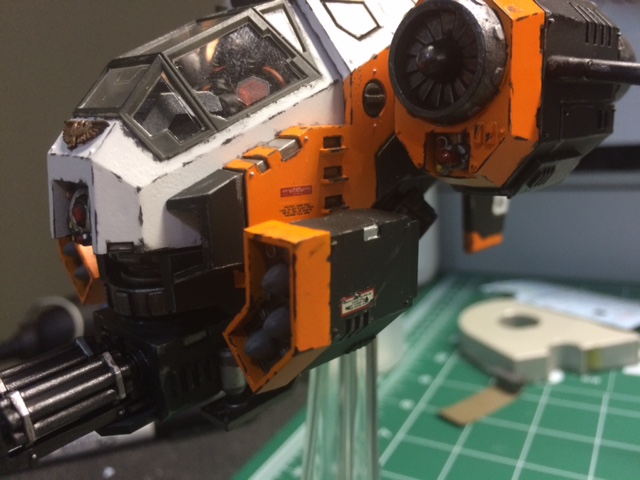
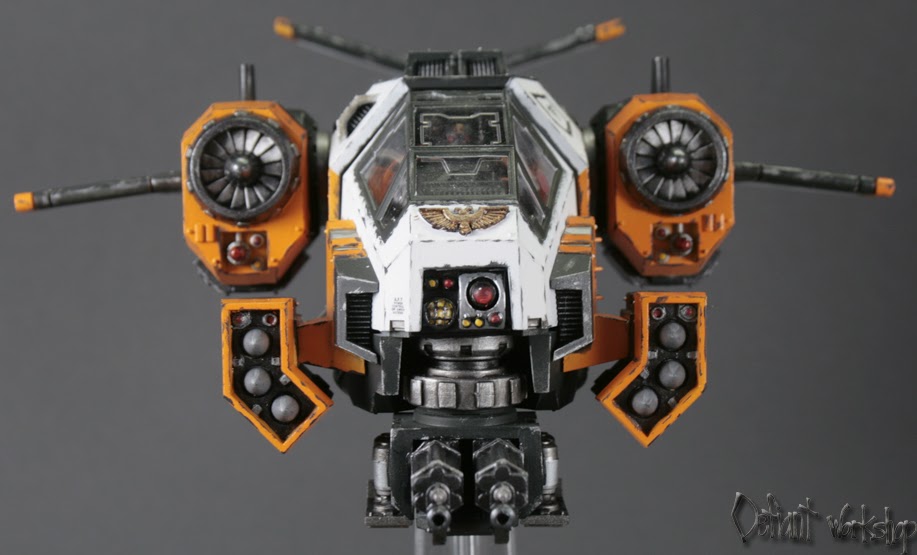
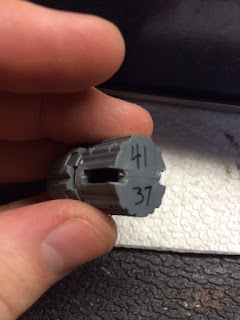
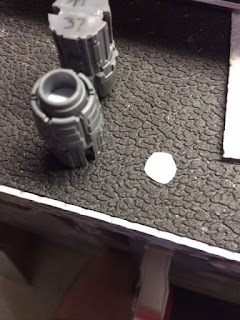
When those two halves are glued, the turbine is locked in place. So, I decided to clip pieces off the back, and let the turbine "slide" in instead of clipping in. This will allow me to completely paint each piece individually without the terror of masking:

Image

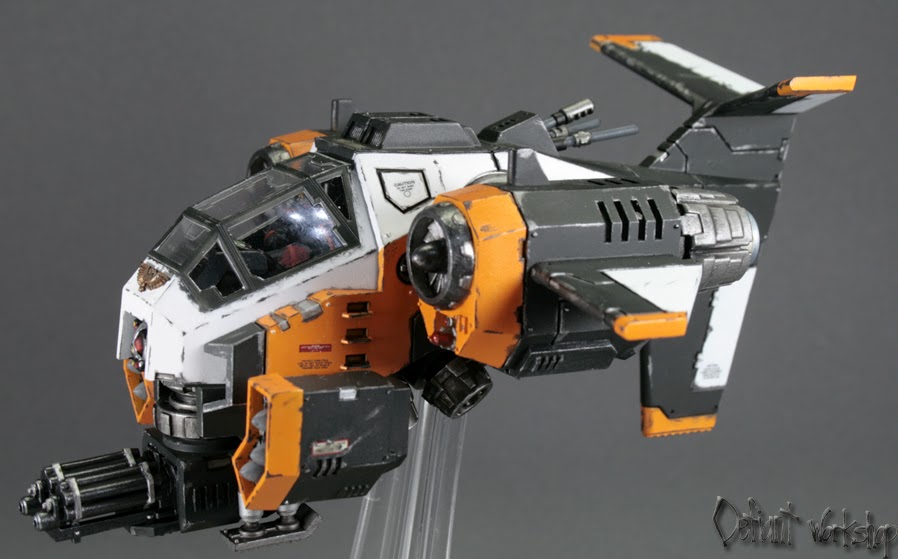
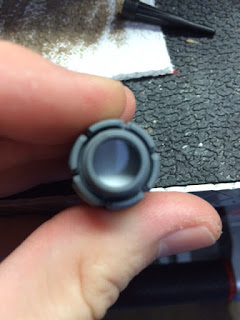
Also, before gluing the tips onto the turbine pieces, I cut some sheet styrene out and glued it in, so there isn't a gaping chasm into the inner part of the model, which, while dark, still shows off the nasty insides of the kit.
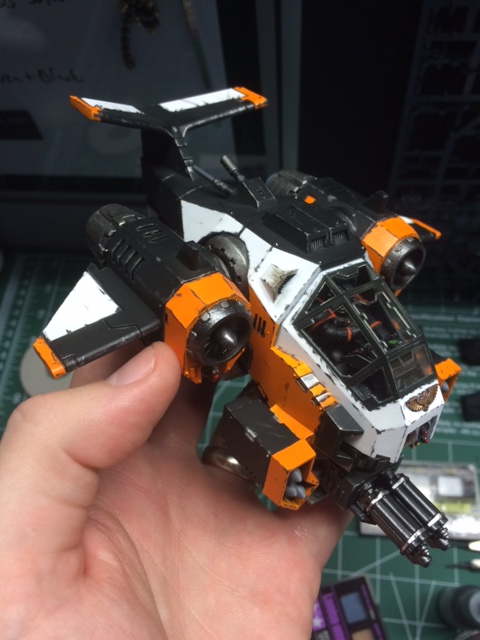
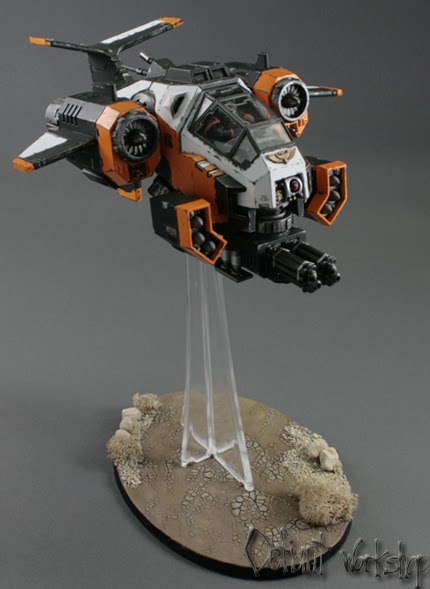
Image

Image

Thanks for looking!
Last edited by DefiantWorkshop on July 9th, 2015, 12:30 pm, edited 1 time in total.
User avatar
DefiantWorkshop
Registered Seller
Registered Seller
Posts: 1517
Joined: April 6th, 2004, 4:30 pm

Re: Games Workshop Stormtalon (WIP)

#2 Post by DefiantWorkshop »

I got some free time to get some paint down. I take a lot of time planning my moves when I make models. It makes things excruciatingly more slow going, but I like to think I have less soul-crushing mistakes that make me trash a kit as well. Part of this planning process was the knowledge that I had to finish 100% of the cockpit interior before really getting to work on the kit proper.

I started by basing the inside with Tamiya's metallic black, then picking out the lights and other details. I used a few different references when painting the inside, and from looking at aircraft interiors, I wanted to give the semblance that SOME of these buttons and toggles just aren't being used. Some of them I painted as "lit" and some were just the darkest base coat to indicate them being "off." Once the glass goes on, though, you probably won't be able to see, but such is the way of the modeler...most of our time is spent on tiny middling details that nobody will notice but the maker.

Image

Image

The next step was to paint the marine. I've never really done much in the way of painting space marines, so I put this off as long as I could. He's not set up for any particular chapter, just designed to look like he fits with the color scheme I wanted for the actual vehicle, and a very low-fi paint job since the canopy glass will cover most of him anyway. I assembled the head, torso, and legs, then slid him in, since his arms actually attach to the console of the Stormtalon. Once in place, I used tweezers to place the arms in the right spots, but this made putting the shoulder pads on difficult. I used low tack tape, and put glue inside, them wedged it in place:

Image

Image

That's it for now, thanks for looking!
Fauberoptic
Seam Filler
Posts: 371
Joined: September 9th, 2013, 6:19 pm
Location: Teays Valley, WV and Portsmouth, OH

Re: Games Workshop Stormtalon (WIP)

#3 Post by Fauberoptic »

like the approach you are taking. Looking really nice so far!
~Jason Fauber
User avatar
DefiantWorkshop
Registered Seller
Registered Seller
Posts: 1517
Joined: April 6th, 2004, 4:30 pm

Re: Games Workshop Stormtalon (WIP)

#4 Post by DefiantWorkshop »

Thanks!

The color scheme I wanted was inspired by those sci-fi games, and some movies, that present a sinister sterile future. A lot of these use a white/orange scheme that I wanted to borrow and create a gunship of similar style, adding some black to offset the bright colors.

After priming the whole thing white, I laid a base Tamiya white coat down on the whole thing. Even though overall surface area will be mostly black, its easier for me to mask less on the front end, than get the overall color right to start and do MORE masking for the white. So anything that remained white, after the base coat was given a couple of hours to dry, was masked off, then a base coat of orange (which goes over white better than black) was applied somewhat sloppily (because I can fix major mistakes with the black coat later).

Image

After the orange was dry, I masked off just the orange, and sprayed my black coat down (more specifically, Tamiya NATO Black, which is almost black, but with a very slight hint of green and gray), and then pulled up my masks, including the canopy, so now the look is really starting to come together:

Image

A quick test fit assembly (not glued) after a few of the details were picked out, and the color scheme is looking really good, possibly my favorite combination I've done yet. What do you all think?

Image
User avatar
DefiantWorkshop
Registered Seller
Registered Seller
Posts: 1517
Joined: April 6th, 2004, 4:30 pm

Re: Games Workshop Stormtalon (WIP)

#5 Post by DefiantWorkshop »

I'm really happy with how the color scheme had been coming, but once I started detailing it, the colors really started to make sense and look how I wanted them to appear. The craft has almost a "poisonous insectoid" appearance that I'm really digging.

Anyways, on with the show. I started the detailing and weathering process by going through the panel lines with a black wash. That's where the benefit of using the Tamiya NATO Black, instead of "real" black, comes in...the wash further deepens the panel lines, instead of just being more black. The NATO Black is a half step lighter than my wash, so it makes the panel lines really pop.

I also started utilizing a lot of Vallejo Chrome (which is really a white metal, not reflective like Alclad) and some Black Metal as well to offset the typical GW "Leadbelcher/Iron Breaker/Runefang" combo. A lot of the Stormtalons that I researched used edge painting to increase depth, but with such a liberal use of white, it was going to be difficult to edge highlight to a higher tone, so instead I went lower, using Vallejo Charcoal as an edge paint almost, to weather the corners and lines. I used Necron Compound for the black pieces:

Image

By now, its getting close to the individual pieces being ready to be glued together, and I'm super impatient when it comes to that...so despite my better intuitions, I glued it all together anyway, once the detailing and weathering was done.

Image
User avatar
DefiantWorkshop
Registered Seller
Registered Seller
Posts: 1517
Joined: April 6th, 2004, 4:30 pm

Re: Games Workshop Stormtalon (WIP)

#6 Post by DefiantWorkshop »

Adding decals to really make this stand out.

I fortunately had quite a few "warning" and other text and detail decals left over from my SAFS Snowman kit I finished a while back. I applied a few of those on the Stormtalon, eschewing the kit decals, which are dreadful and gigantic. I thought the smaller caution text decals were a better fit for what I wanted to accomplish.

Some of them, however, are a little too shiny and new. This is easily remedied.

Image

After applying the decal, lightly, lightly dab it with a cotton swab, and press the water out of it. Let it sit for a few hours and dry up. Then I take an Xacto blade and make random scrapes and cuts across it. Then, add a little bit of weathering powder, or even chalk pastel, to the top to give it that grimy, worn look:

Image

The difference is well worth the small amount of time to get it right. From there, its time to seal it, and call this guy complete! Full pictures to come soon, thanks for visiting!
Image
aussiedave
Earl of Epoxy
Posts: 1786
Joined: April 28th, 2005, 11:57 pm
Location: Brisbane, Australia

Re: Games Workshop Stormtalon (WIP)

#7 Post by aussiedave »

Thanks for sharing all the pics. Looks great!
User avatar
DefiantWorkshop
Registered Seller
Registered Seller
Posts: 1517
Joined: April 6th, 2004, 4:30 pm

Re: Games Workshop Stormtalon - FINISHED with pictures!

#8 Post by DefiantWorkshop »

Here's the finished product, hope you all enjoy! I'll save the bandwidth, you can check out more pictures here.

Image

Image

Image

Image

Image
User avatar
ira
Earl of Epoxy
Posts: 1959
Joined: June 20th, 2012, 9:42 pm
Location: Sonoma County, CA
Contact:

Re: Games Workshop Stormtalon - FINISHED with pictures!

#9 Post by ira »

Looks Great!
8)
User avatar
llricmc
Registered Seller
Registered Seller
Posts: 2142
Joined: August 11th, 2005, 3:51 am
Location: Karloffornia

Re: Games Workshop Stormtalon - FINISHED with pictures!

#10 Post by llricmc »

Wow! This really nicely done!
Your WIP introduced me to some new techniques........Thanks!
Ric McHone
User avatar
DefiantWorkshop
Registered Seller
Registered Seller
Posts: 1517
Joined: April 6th, 2004, 4:30 pm

Re: Games Workshop Stormtalon - FINISHED with pictures!

#11 Post by DefiantWorkshop »

Awesome! Sharing is caring!

A lot of things I do might be old hat to some, but it might be the first thing you stumble across when looking for a tip, so I post it all anyway. Too many times have I looked for tips and tricks on what I feel are simple things and can't find them. Also, that's why I love painting all different kinds of kits...things I learn from one carry over to another and give new perspective on fixing problems. Glad it could help, if it makes anyone's modeling a little easier, its worth documenting! Thanks for taking the time to look and comment!
whiteraven97
Seam Filler
Posts: 394
Joined: December 29th, 2006, 4:07 pm

Re: Games Workshop Stormtalon - FINISHED with pictures!

#12 Post by whiteraven97 »

That's about a thousand times better than the standard GW finish. I keep eyeballing their vehicle kits but I can never pull the trigger. Their prices kind of put me off. However, this was a significant nudge.
User avatar
DefiantWorkshop
Registered Seller
Registered Seller
Posts: 1517
Joined: April 6th, 2004, 4:30 pm

Re: Games Workshop Stormtalon - FINISHED with pictures!

#13 Post by DefiantWorkshop »

Thanks whiteraven! They actually are good kits. Since its game-based, some things aren't as much value for the money, but this was a less expensive one. Lots of plastic for the $$$, and very few people are doing kits along this cooler sci fi subject matter at this level of production, so I feel like the $$$ is usually worth it, since they're less pain fitting things together.
User avatar
RickDTM
Registered Seller
Registered Seller
Posts: 3833
Joined: December 19th, 2003, 5:42 pm
Location: Baltimore MD
Contact:

Re: Games Workshop Stormtalon - FINISHED with pictures!

#14 Post by RickDTM »

Great work. I agree, your color scheme is sweet on the kit.
Check out my work at my Facebook art page: Rick Cantu's Paintwerks
User avatar
modeljunky
Registered Seller
Registered Seller
Posts: 2683
Joined: September 3rd, 2007, 12:42 pm
Location: N.J.

Re: Games Workshop Stormtalon - FINISHED with pictures!

#15 Post by modeljunky »

WOW that is incredible. I've been out of the Game for about 10 years, but recently dragged back in when my kids discovered my mini's.. They inherited my Necron and Tau, They would have to kill me for my Orks.
I'm amazed how well these kits are now.
Its not just a hobby...its an addiction
User avatar
DefiantWorkshop
Registered Seller
Registered Seller
Posts: 1517
Joined: April 6th, 2004, 4:30 pm

Re: Games Workshop Stormtalon - FINISHED with pictures!

#16 Post by DefiantWorkshop »

Thanks guys!

Modeljunky - Never played a game in my life, never even cracked a rulebook open. The models (most of them anyway) are really well done, so I just buy them to paint for fun. Its easier to find cool subject matter on the shelves of GW than it is at my local hobby store, simple as that. Helps that the kits are cast and engineered at a high level too.
User avatar
LOBOREX
Duke of Dry Brush
Posts: 4084
Joined: October 15th, 2004, 5:04 pm
Location: DEEPEST, DARKEST, WOODS OF NEW YORK.

Re: Games Workshop Stormtalon - FINISHED with pictures!

#17 Post by LOBOREX »

Very cool.
Helena is here at hand;
And the youth, mistook by me,
Pleading for a lover's fee.
Shall we their fond pageant see?
Lord, what fools these mortals be! -Puck
User avatar
kevtk135
Registered Seller
Registered Seller
Posts: 6267
Joined: December 20th, 2003, 2:15 am
Location: SI, NY
Contact:

Re: Games Workshop Stormtalon - FINISHED with pictures!

#18 Post by kevtk135 »

Excellent job!!
I'm really liking some of the GW ships.
Kev
~~~

I used to never finish anyth

My little corner of the Net: http://www.kevtk.blogspot.com
Post Reply