Seams and Texture
Moderators: tay666, Moderators
-
lorigrey

- Jack of all Trades
- Posts: 633
- Joined: July 17th, 2014, 9:35 pm
- Location: Great Falls, Montana
Seams and Texture
I just got a Nosferatu kit. The one with the castle base. It has a very fine seam running along the top of the head and the head is textured. How do I replicate the texture after I sane the seam? I was thinking oil paints and a sponge, but past that I have no idea. Thanks for your help.


Re: Seams and Texture
You're on the right track. I have used Liquitex Modeling Paste, slightly thinned with water and stippled on with a sponge.
Ric McHone
-
lorigrey
- Jack of all Trades
- Posts: 633
- Joined: July 17th, 2014, 9:35 pm
- Location: Great Falls, Montana
Re: Seams and Texture
Thank you I'll give it a try.

Re: Seams and Texture
Depending on what you are trying to recreate, you could always make a texture stamp of the surrounding area and use putty. Otherwise, just like it makeup, stippling over edges and increasing the area out hides a lot.
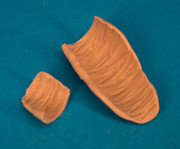
The old Aurora Mummy has a hideous seal running lengthwise, so I just grabbed some silicone and cast a piece, then filled with Aves and pressed the texture. Beats the heck out of trying to sculpt each and every bandage line.

The old Aurora Mummy has a hideous seal running lengthwise, so I just grabbed some silicone and cast a piece, then filled with Aves and pressed the texture. Beats the heck out of trying to sculpt each and every bandage line.
Plausible deniability.