Antiques they might be, but it’s time to crack into one for a change from the resin! I was very lucky to grab this one on Ebay recently for a very good price.
The owner was convinced it was missing several parts, so priced it accordingly. Asking to see images to determine what would be necessary in terms of
scratch building, I quickly realised the kit was actually complete! Mum's the word!
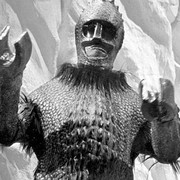
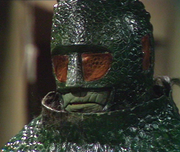
The Ice Warriors first appeared on BBC television with Patrick Troughton back in the days of black and white TV, but I only remember them alongside
John Pertwee in the early 70’s. I always loved the design of these Martian bad boys, very much in the B movie style of the lumbering,
big, clumsy rubber suit. At 6 years old, they certainly did the job and scared the crap out of me! All the years on, I have to say I still prefer the original design
to the new version.
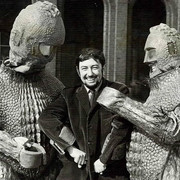
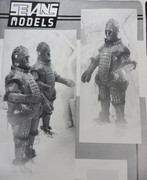
A quick bit of back story regarding 'Sevans Models' for those who missed out. Set up by Stuart Evans, a young model builder with a passion
for all things Dr Who, his first release was a 1/5th scale Dalek. Stuart gained access to the BBC props cupboard and was able to measure and
photograph every detail to be incorporated into these kits. They were billed as the most accurate models of the Daleks ever created and having
built one I can confirm they live up to that status.
Very much a cottage industry / garage style kit, largely in vac-formed plastic with metal mesh and other details. Quite challenging to build but
well worth the effort, I built one of the second release and also have the highly sought after Movie Dalek still in the stash. Stuart went on the
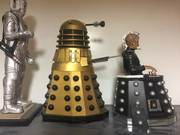
produce an Ice Warrior, a Cyberman and Cyber Controller, a Michael Wisher and also Terry Malloy Davros the creator of the Daleks and I believe
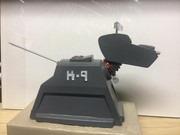
a K9 in this large and impressive 1/5th scale.
Nearly 40 years on, these kits still create bidding wars when they come up on Ebay, underlining the fact that they are still highly sought after
by serious collectors.
So, let’s get this Ice Warrior underway! Here’s a pic of the box and contents, along with an impressive instruction sheet. Apparently the finished model
will be around 16 inches tall! Stuart really did his homework on the history of these guys and offers plenty of hints and tips on building and painting.
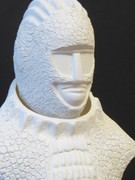
Main parts are vac formed in sheet styrene, there is a choice of 2 styles of head and also a bundle of real fur to detail the leg and arm joints!

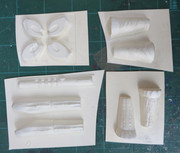

The textures of the reptilian skin are nicely done considering, but the vac form process certainly isn’t going to deliver the very fine details
we are used to with injection moulding or resin castings. As the styrene sheet is sucked over the mold, the top side of the parts capture detail very well,
while the vertical sides tend to go a little ‘smooth’. I’ve therefore decided to have a go at re sculpting any surfaces that are lacking in details with Milliput.
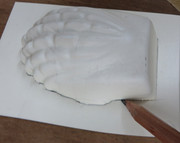
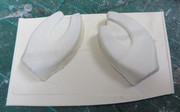
Vac forms tend to be regarded with terror by a lot of modellers, but with a little care and patience they’re not so bad. I started with the head,
drawing round the parts with a pencil to define the edges and then lightly scoring round the piece with a sharp scalpel.
With some gentle flexing the part pops away from the backing sheet very easily.

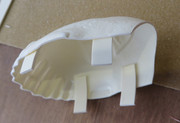
I then sanded down the rough spots, glued tabs of scrap plastic on the inner edges and using liquid cement got the head together.
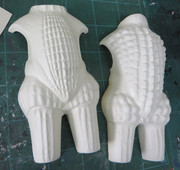
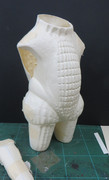
The process was repeated with all other major body parts, the torso, arms and lower legs. Believe it or not, it’s quite therapeutic and nice to
flex the old school modelling skills again!

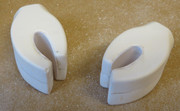
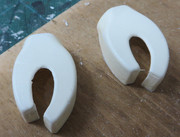
The claws come with the centres filled in, but at this large scale they really need to look more functional.
An easy fix, I cut away the dead areas, glued the parts together and then using very thin plastic card added the inner walls.
The plastic melts together beautifully with Tamiya liquid cement, leaving very little in terms of gaps to fill.

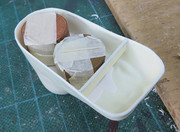
Finally I assembled the feet, adding internal bracing with scrap plastic and also a stack of 1 penny coins taped up with
masking tape as suggested for weight.
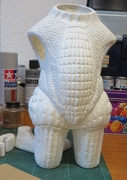
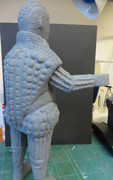
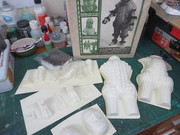
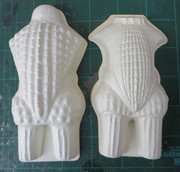
So, here are all the main elements together, ready for the second stage of re sculpting all missing surface details with
epoxy putty and sanding and blending all joints. I’ve sourced several good close up images of the original props as reference.
The surfaces of the suits are covered in a heavy scale pattern, so I’ve got my work cut out to bring the kit up to the
same level of detail.

Another challenge will be the arms, they assemble as straight units, designed to be cut at the elbow and fixed with scrap plastic
to create angle of the modeller’s choice. Hmm, a little crude perhaps but hopefully not too demanding.
Back with another up date as soon as bench time allows!