The Pumpkin Thief

Show off your in-progress builds! This is the place to post questions about building and painting your model kits and to share your latest techniques.

Moderators: tay666, Moderators

Post Reply
Message
Author
User avatar
kevtk135
Registered Seller
Registered Seller
Posts: 6268
Joined: December 20th, 2003, 2:15 am
Location: SI, NY
Contact:

The Pumpkin Thief

#1 Post by kevtk135 »

This neat one part model was done by John Dennett and MoonDevil Studios last year. I got it so close to Halloween then, there was no chance of me getting it done it time. But I made sure to finish it in time this year. The kit was very well done in orange resin - no pin holes or any real seam lines. There was a hint of one, and that cleaned up in minutes.

Image
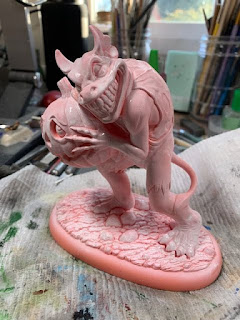
White primer added giving the pink look

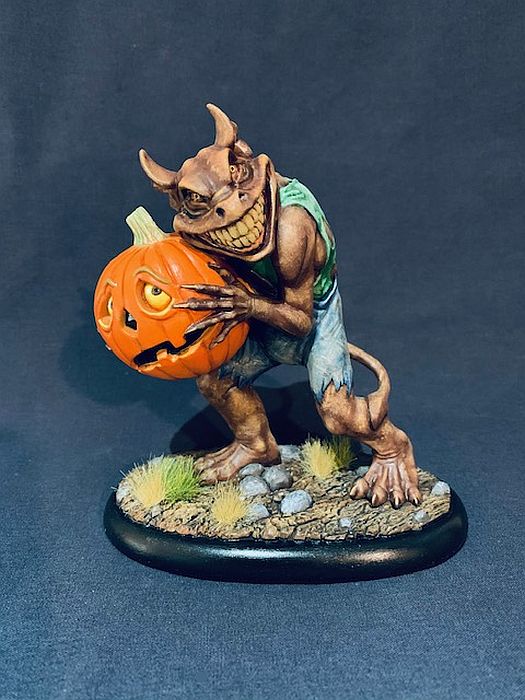
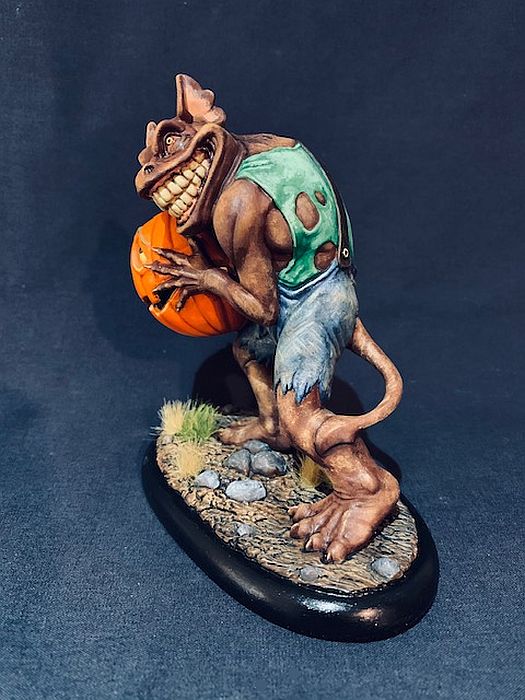
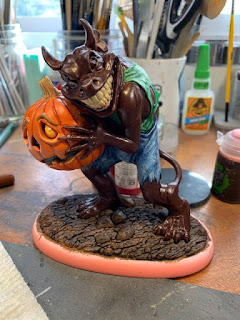
This was another kit that besides the obvious colors of the pumpkin, I have no idea where to go. Looking at the figure, he looked like a rat, but had the Devil tail. Being with the old images of the Devil being red, I started out with V's Hull Red, which as an obvious brown to it hearkening back to the rat idea. The pants looked like overalls to me, so that said blue, and with the red hue of the skin, the opposite on the color wheel is green. So the shirt was made green.

Image

Image
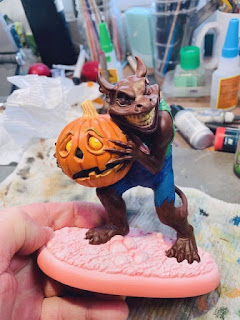
Citadel washes added

I left the citadel washes to dry overnight, and then started my highlighting. Following the techniques of a new mini painters I admire, when washed, the model darkened (naturally) so the first highlight is the original base color - Hull Red. Then I added Flesh to the Hull Red to lightened it - covering a smaller area. More flesh was added and a lighter again 3rd highlight finished the skin off. Same was done for the pants and shirt, except I added a heavier drybrush to the pants to give them some texture. When all was finished I added some brown pigment to the pants to dirty them up. The pumpkin was given a similar treat, except I used Citadel orange. Vallejo's orange and yellows are sadly weakly pigmented.

The ground was painted washed and highlighted, using brown for the earth, and gray for the rocks. I then added some 12mm grass tufts to complete the scene. Painted the very bottom a glass black and I was done.

Thanks for looking.

Image

Image

Image
Kev
~~~

I used to never finish anyth

My little corner of the Net: http://www.kevtk.blogspot.com
Scooke123
Bishop of Build Ups
Posts: 3127
Joined: November 28th, 2007, 8:24 pm
Location: St Charles, MO

Re: The Pumpkin Thief

#2 Post by Scooke123 »

Very cool!!!
Steve Cooke
SteveG
Glue Sniffer
Posts: 112
Joined: December 18th, 2018, 6:48 am

Re: The Pumpkin Thief

#3 Post by SteveG »

Nicely done :like
User avatar
JJCap1
Bishop of Build Ups
Posts: 3197
Joined: December 20th, 2003, 3:29 pm
Location: Carlisle, PA
Contact:

Re: The Pumpkin Thief

#4 Post by JJCap1 »

Looks great. Makes me want to get one!
User avatar
overspray
Master of Masking
Posts: 991
Joined: March 4th, 2019, 9:22 pm

Re: The Pumpkin Thief

#5 Post by overspray »

Nice kit, you did a great job.
User avatar
kevtk135
Registered Seller
Registered Seller
Posts: 6268
Joined: December 20th, 2003, 2:15 am
Location: SI, NY
Contact:

Re: The Pumpkin Thief

#6 Post by kevtk135 »

Thanks guys.
Was a fun paintup (once I had a direction). :wink: :lol:
Kev
~~~

I used to never finish anyth

My little corner of the Net: http://www.kevtk.blogspot.com
Post Reply