Wow.
We really are living in the golden age of model building. All the options available now are mind blowing.
Now … Voyager…
Moderators: tay666, Moderators
-
tay666

- Site Admin
- Posts: 19126
- Joined: December 8th, 2003, 11:20 am
- Location: Conneaut Ohio
- Contact:
Re: Now … Voyager…
Trevor Ylisaari
Check out My Prehistoric Scenes site and forum
"Nothing like a trail of blood
To find your way back home."
WANTED - Bat Rider - produced by Wraiths
Check out My Prehistoric Scenes site and forum
"Nothing like a trail of blood
To find your way back home."
WANTED - Bat Rider - produced by Wraiths
-
Squidy53

- Squire of the Sprue
- Posts: 1083
- Joined: January 17th, 2023, 12:26 am
- Location: Adelaide, Australia
- Contact:
Re: Now … Voyager…
Hello. I really appreciate your generosity in sharing and your organization not just in the build process but in documenting it so clearly for others. My own process is way too "organic" (= messy).
I'll follow your build with great interest. Thanks again.
I'll follow your build with great interest. Thanks again.
Steve Walsh
______________________________
Perfection in the enemy of excellence
______________________________
Perfection in the enemy of excellence
-
Trekkriffic

- Master of Masking
- Posts: 964
- Joined: April 18th, 2014, 10:15 pm
Re: Now … Voyager…
Some assembly required…
LED tubes and fibers painted black for light blocking close but not inside the tubes to block any stray light from either
the flasher or the window rectangular LED which are all painted black on the outside and covered with foil for good measure.
All wiring is finished for fantail LEDs:

USS Voyager WIP Img - 143 by Steve J, on Flickr
Clamping after gluing with Testors red tube glue.
Feeding the fiber on the aft top was a lot of fun but eventually they went thru.
I made sure they were extra long in case I broke the end during the press the halves together step.
I used a good amount of the old red tube styrene cement though so hope to see a lot of liquid plastic
squeezed out of the seams- then I know I have a solidly welded joint:

USS Voyager WIP Img - 144 by Steve J, on Flickr
I extended the aft of the fan tail around the window:

USS Voyager WIP Img - 146 by Steve J, on Flickr
Light test. I added a 1/16" piece of strip to the top edge over the window to approx the same level as the window pillars.
Will feather into the hull using AVES before more filing and sanding:

USS Voyager WIP Img - 147 by Steve J, on Flickr
Do you see what I see?

USS Voyager WIP Img - 148 by Steve J, on Flickr
LED tubes and fibers painted black for light blocking close but not inside the tubes to block any stray light from either
the flasher or the window rectangular LED which are all painted black on the outside and covered with foil for good measure.
All wiring is finished for fantail LEDs:
USS Voyager WIP Img - 143 by Steve J, on Flickr
Clamping after gluing with Testors red tube glue.
Feeding the fiber on the aft top was a lot of fun but eventually they went thru.
I made sure they were extra long in case I broke the end during the press the halves together step.
I used a good amount of the old red tube styrene cement though so hope to see a lot of liquid plastic
squeezed out of the seams- then I know I have a solidly welded joint:
USS Voyager WIP Img - 144 by Steve J, on Flickr
I extended the aft of the fan tail around the window:
USS Voyager WIP Img - 146 by Steve J, on Flickr
Light test. I added a 1/16" piece of strip to the top edge over the window to approx the same level as the window pillars.
Will feather into the hull using AVES before more filing and sanding:
USS Voyager WIP Img - 147 by Steve J, on Flickr
Do you see what I see?
USS Voyager WIP Img - 148 by Steve J, on Flickr
-
Splash-Art

- Seam Filler
- Posts: 319
- Joined: October 24th, 2012, 4:57 pm
- Location: Scottsdale, AZ
- Contact:
Re: Now … Voyager…
Just had to check in to see how this awesome build is going! Your attention to the finer details does not go unnoticed, and the lighting is the sweet icing on top. Can't wait to see her fully complete, and with the base. Are you doing anything special with the base? Amazing work!
-
Trekkriffic
- Master of Masking
- Posts: 964
- Joined: April 18th, 2014, 10:15 pm
Re: Now … Voyager…
Thanks for the nice post Splash-Art.Splash-Art wrote: ↑June 27th, 2023, 6:44 pm Just had to check in to see how this awesome build is going! Your attention to the finer details does not go unnoticed, and the lighting is the sweet icing on top. Can't wait to see her fully complete, and with the base. Are you doing anything special with the base? Amazing work!
Yes, detailing has become an obsession for me now that I’m using a magnifier visor.
You see things you just don’t notice with the naked eye.
Still working on the wooden base. I bought a plunge router for my dremel which I will use to rout out a channel on the underside for wiring. I also bought a bit for beveling the edge. So nothing that special really; although, now that I have the Voyager shuttle pack in my hands from Shapeways, I’m thinking of installing some tiny LEDs inside the Aeroshuttle and displaying it lit on its own brass tube on the base underneath Voyager. That would look pretty cool. The base will be satin black. I may have some decals made with white lettering with the ship name and registry. I might also have a decal printed showing an image from the TV show’s introduction. Can you guess which image?
-
Trekkriffic
- Master of Masking
- Posts: 964
- Joined: April 18th, 2014, 10:15 pm
Re: Now … Voyager…
Read on about overcoming momentary despair and fixing your mistakes.
IMO one of the best skills for any decent modeller…
OOPS!

USS Voyager WIP Img - 149 by Steve J, on Flickr
Bad light leak due to an oversite on my part on both of the aft hinges on the winglets and, to a lesser extent, the forward wing face to the forward round hinge of the hull. Will have to fix:

USS Voyager WIP Img - 150 by Steve J, on Flickr
Fixing the godzillas of light leaks. Thin black styrene sheet.
I literally uise very little of this stuff but it was just perfect for gluing onto the winglet sides of the fore and aft hinge segments.
Still, you can see a small gap where i didn’t get the shim quite far enough into the gap.
i will cut a small wedge piece tomorrow to fill the tiny gaps ( top and bottom aft) left from the first attempt with a little cement of the winglet side of the hinge joint:

USS Voyager WIP Img - 151 by Steve J, on Flickr
Slipping a piece of Testors coarse black sanding film into the gap and working it up and down about 8 times to widen the gap between the winglet and the fantail hinge segments before shoving a piece of black styrene sheet into the gap to cover up the light leak caused by the impulse engine 2 mm amber LED:

USS Voyager WIP Img - 152 by Steve J, on Flickr
Had to re-glue the port forward hinge cover after it split open while I figured out how to fix the light leaks.
These covers can be trouble to keep from splitting when the engines are raised and lowered:

USS Voyager WIP Img - 153 by Steve J, on Flickr
NEXT UP…
More light tests and uber detailing. The major light leaks along the hinges are a thing of the past now.
Also, my re-glued hinge cover is holding but I came up with a simple idea for preventing any future cover cracks or splits.
IMO one of the best skills for any decent modeller…
OOPS!
USS Voyager WIP Img - 149 by Steve J, on Flickr
Bad light leak due to an oversite on my part on both of the aft hinges on the winglets and, to a lesser extent, the forward wing face to the forward round hinge of the hull. Will have to fix:
USS Voyager WIP Img - 150 by Steve J, on Flickr
Fixing the godzillas of light leaks. Thin black styrene sheet.
I literally uise very little of this stuff but it was just perfect for gluing onto the winglet sides of the fore and aft hinge segments.
Still, you can see a small gap where i didn’t get the shim quite far enough into the gap.
i will cut a small wedge piece tomorrow to fill the tiny gaps ( top and bottom aft) left from the first attempt with a little cement of the winglet side of the hinge joint:
USS Voyager WIP Img - 151 by Steve J, on Flickr
Slipping a piece of Testors coarse black sanding film into the gap and working it up and down about 8 times to widen the gap between the winglet and the fantail hinge segments before shoving a piece of black styrene sheet into the gap to cover up the light leak caused by the impulse engine 2 mm amber LED:
USS Voyager WIP Img - 152 by Steve J, on Flickr
Had to re-glue the port forward hinge cover after it split open while I figured out how to fix the light leaks.
These covers can be trouble to keep from splitting when the engines are raised and lowered:
USS Voyager WIP Img - 153 by Steve J, on Flickr
NEXT UP…
More light tests and uber detailing. The major light leaks along the hinges are a thing of the past now.
Also, my re-glued hinge cover is holding but I came up with a simple idea for preventing any future cover cracks or splits.
-
Trekkriffic
- Master of Masking
- Posts: 964
- Joined: April 18th, 2014, 10:15 pm
Re: Now … Voyager…
Clamping. Light test with consolidated wiring bundles:

USS Voyager WIP Img - 154 by Steve J, on Flickr
I love a good clamp and this small ratchet clamp gives a good clamping for sure.
I'm thinking of punching out some small styrene discs to glue onto the four hinge covers.
That should do the trick if necessary. Hopefully I see some plastic squeezing from the seam in the morning:

USS Voyager WIP Img - 155 by Steve J, on Flickr
Aft window LED light test:

USS Voyager WIP Img - 156 by Steve J, on Flickr
Fantail windows with backlit panel.
This is after AVES application so all gaps have been filled, filed, and sanded.
Still some work to do on the top rim with the fantail deck above.
Then will brush with Mister Surfacer and sand some more:

USS Voyager WIP Img - 157 by Steve J, on Flickr
All lights except the center white flasher are on:

USS Voyager WIP Img - 158 by Steve J, on Flickr
I punched four discs out of thin Plastruct strip and glued them to the ends of each hinge using CA.
This should prevent any further stress cracking of the hinge cylinders caused by the engagement of the hinge mechanism:

USS Voyager WIP Img - 161 by Steve J, on Flickr

USS Voyager WIP Img - 162 by Steve J, on Flickr
Small half round rod segments 2 mm long are added to the raised panels flanking the forward hinge cover caps:

USS Voyager WIP Img - 163 by Steve J, on Flickr
Mister Surfacer is brushed around the aft end of the fantail after putty has cured:

USS Voyager WIP Img - 165 by Steve J, on Flickr
Aerowing 3D printed in clear ultra smooth material by Shapeways. Top view:

USS Voyager WIP Img - 167 by Steve J, on Flickr
USS Voyager WIP Img - 154 by Steve J, on Flickr
I love a good clamp and this small ratchet clamp gives a good clamping for sure.
I'm thinking of punching out some small styrene discs to glue onto the four hinge covers.
That should do the trick if necessary. Hopefully I see some plastic squeezing from the seam in the morning:
USS Voyager WIP Img - 155 by Steve J, on Flickr
Aft window LED light test:
USS Voyager WIP Img - 156 by Steve J, on Flickr
Fantail windows with backlit panel.
This is after AVES application so all gaps have been filled, filed, and sanded.
Still some work to do on the top rim with the fantail deck above.
Then will brush with Mister Surfacer and sand some more:
USS Voyager WIP Img - 157 by Steve J, on Flickr
All lights except the center white flasher are on:
USS Voyager WIP Img - 158 by Steve J, on Flickr
I punched four discs out of thin Plastruct strip and glued them to the ends of each hinge using CA.
This should prevent any further stress cracking of the hinge cylinders caused by the engagement of the hinge mechanism:
USS Voyager WIP Img - 161 by Steve J, on Flickr
USS Voyager WIP Img - 162 by Steve J, on Flickr
Small half round rod segments 2 mm long are added to the raised panels flanking the forward hinge cover caps:
USS Voyager WIP Img - 163 by Steve J, on Flickr
Mister Surfacer is brushed around the aft end of the fantail after putty has cured:
USS Voyager WIP Img - 165 by Steve J, on Flickr
Aerowing 3D printed in clear ultra smooth material by Shapeways. Top view:
USS Voyager WIP Img - 167 by Steve J, on Flickr
-
Splash-Art
- Seam Filler
- Posts: 319
- Joined: October 24th, 2012, 4:57 pm
- Location: Scottsdale, AZ
- Contact:
Re: Now … Voyager…
I can totally relate to your attention to details, and the need for eye specs as well! It's just amazing how you manage to keep all your cuts and extra additions so sharp and clean. I worked on the Nautilus from 20,000 leagues several years back. I'm sure you may have built one? I'm positive, if you did it's far better than mine! Anyway, I'm a fan for sure.Trekkriffic wrote: ↑June 28th, 2023, 1:12 pmThanks for the nice post Splash-Art.Splash-Art wrote: ↑June 27th, 2023, 6:44 pm Just had to check in to see how this awesome build is going! Your attention to the finer details does not go unnoticed, and the lighting is the sweet icing on top. Can't wait to see her fully complete, and with the base. Are you doing anything special with the base? Amazing work!
Yes, detailing has become an obsession for me now that I’m using a magnifier visor.
You see things you just don’t notice with the naked eye.
Still working on the wooden base. I bought a plunge router for my dremel which I will use to rout out a channel on the underside for wiring. I also bought a bit for beveling the edge. So nothing that special really; although, now that I have the Voyager shuttle pack in my hands from Shapeways, I’m thinking of installing some tiny LEDs inside the Aeroshuttle and displaying it lit on its own brass tube on the base underneath Voyager. That would look pretty cool. The base will be satin black. I may have some decals made with white lettering with the ship name and registry. I might also have a decal printed showing an image from the TV show’s introduction. Can you guess which image?

-
Trekkriffic
- Master of Masking
- Posts: 964
- Joined: April 18th, 2014, 10:15 pm

-
Splash-Art
- Seam Filler
- Posts: 319
- Joined: October 24th, 2012, 4:57 pm
- Location: Scottsdale, AZ
- Contact:
Re: Now … Voyager…
Wow! You are so right...I can say you do a far better job than I can. As mentioned earlier by another member, your step by step pictures are awesome! Looking forward to seeing more.
-
Trekkriffic
- Master of Masking
- Posts: 964
- Joined: April 18th, 2014, 10:15 pm
Re: Now … Voyager…
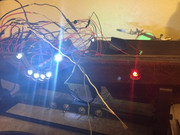
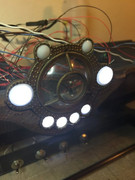
Glad you enjoy the builds! Here’s what that rat’s nest of wires above created…

USS Saratoga by Steve J, on Flickr
USS Saratoga by Steve J, on Flickr
-
barad_dur

- Registered Seller

- Posts: 3821
- Joined: June 3rd, 2007, 1:42 am
- Location: King George VA USA
Re: Now … Voyager…
Very cool!
See my model kit collection on YouTube Model Club TV Episode 86
See my kitbash work-in-progress pics in the Kustomizers section of the clubhouse
Thanks for looking !
See my kitbash work-in-progress pics in the Kustomizers section of the clubhouse
Thanks for looking !
-
bucketfoot-al

- Registered Seller
- Posts: 8359
- Joined: September 10th, 2005, 6:16 am
- Location: Back in The Lone Star State.
- Contact:
Re: Now … Voyager…
Gorgeous nighttime display!!!

Bucketfoot-Al
http://bucketfoot-al.tripod.com/DinoModels/
"You may all go to Hell. I will go to Texas."
-Davy Crockett
http://bucketfoot-al.tripod.com/DinoModels/
"You may all go to Hell. I will go to Texas."
-Davy Crockett
-
Trekkriffic
- Master of Masking
- Posts: 964
- Joined: April 18th, 2014, 10:15 pm
Re: Now … Voyager…
Delta Flier printed by Shapeways. This tiny ship is hollow:

USS Voyager WIP Img - 169 by Steve J, on Flickr
Types 8 and 9 shuttle craft included in the Voyager shuttle craft pack by Shapeways.
I lost one of the type 8: shuttles down the washtub drain while cleaning the parts.
These tiny shuttles are amazingly detailed with cockpits and pilot seats visible thru the forward windows:

USS Voyager WIP Img - 170 by Steve J, on Flickr
I purchased a printed 1/670 scale accurate shuttle bay for my Revell Voyager.
After adding sections of Evergreen sheet to the backs of the exceptionally thin floor and walls I sprayed the bay with Krylon Colormaxx grey primer:

USS Voyager WIP Img - 171 by Steve J, on Flickr
Adding Evergreen and Plastruct strip to the backside of the thin, fragile walls and floor along with angle brackets to reinforce the corners really strengthened the shuttle bay. This photo is after two coats of primer:

USS Voyager WIP Img - 172 by Steve J, on Flickr
.010 styrene sheet was trimmed to fit under the alarmingly thin rear section of the floor and to stiffen the equally fragile walls of the shuttle bay:

USS Voyager WIP Img - 173 by Steve J, on Flickr
Evergreen sheet trimmed to fit and glued to the back of the rear wall of the bay:

USS Voyager WIP Img - 174 by Steve J, on Flickr
Reinforcing the starboard side wall with Plastruct strip was a no brainer after it cracked off from the floor when I tried to straighten it.
The trick to doing this turned out to be heat. Prior to priming I soaked the parts in warm, soapy water to remove some wax residue;
this made the parts much more pliable and receptive to bending into alignment.
Lesson learned:

USS Voyager WIP Img - 175 by Steve J, on Flickr
Primed the shuttle bay roof panel, I’ll add an LED strip down the center for lighting.
This part fits perfectly atop the shuttle bay walls during test fitting:

USS Voyager WIP Img - 176 by Steve J, on Flickr
Evergreen styrene strips were cut, glued, and filed to shape to give the window framing even thickness and a flat profile. AVES will be applied to match the silhouette of the framing and blend the thickened top rim into the rim of the fantail. The result will be a flat, vertical rim with a deeply recessed group of window.:

USS Voyager WIP Img - 177 by Steve J, on Flickr
Much improved fantail window framing:

USS Voyager WIP Img - 178 by Steve J, on Flickr
More to come as I work on the deflector dish...
USS Voyager WIP Img - 169 by Steve J, on Flickr
Types 8 and 9 shuttle craft included in the Voyager shuttle craft pack by Shapeways.
I lost one of the type 8: shuttles down the washtub drain while cleaning the parts.
These tiny shuttles are amazingly detailed with cockpits and pilot seats visible thru the forward windows:
USS Voyager WIP Img - 170 by Steve J, on Flickr
I purchased a printed 1/670 scale accurate shuttle bay for my Revell Voyager.
After adding sections of Evergreen sheet to the backs of the exceptionally thin floor and walls I sprayed the bay with Krylon Colormaxx grey primer:
USS Voyager WIP Img - 171 by Steve J, on Flickr
Adding Evergreen and Plastruct strip to the backside of the thin, fragile walls and floor along with angle brackets to reinforce the corners really strengthened the shuttle bay. This photo is after two coats of primer:
USS Voyager WIP Img - 172 by Steve J, on Flickr
.010 styrene sheet was trimmed to fit under the alarmingly thin rear section of the floor and to stiffen the equally fragile walls of the shuttle bay:
USS Voyager WIP Img - 173 by Steve J, on Flickr
Evergreen sheet trimmed to fit and glued to the back of the rear wall of the bay:
USS Voyager WIP Img - 174 by Steve J, on Flickr
Reinforcing the starboard side wall with Plastruct strip was a no brainer after it cracked off from the floor when I tried to straighten it.
The trick to doing this turned out to be heat. Prior to priming I soaked the parts in warm, soapy water to remove some wax residue;
this made the parts much more pliable and receptive to bending into alignment.
Lesson learned:
USS Voyager WIP Img - 175 by Steve J, on Flickr
Primed the shuttle bay roof panel, I’ll add an LED strip down the center for lighting.
This part fits perfectly atop the shuttle bay walls during test fitting:
USS Voyager WIP Img - 176 by Steve J, on Flickr
Evergreen styrene strips were cut, glued, and filed to shape to give the window framing even thickness and a flat profile. AVES will be applied to match the silhouette of the framing and blend the thickened top rim into the rim of the fantail. The result will be a flat, vertical rim with a deeply recessed group of window.:
USS Voyager WIP Img - 177 by Steve J, on Flickr
Much improved fantail window framing:
USS Voyager WIP Img - 178 by Steve J, on Flickr
More to come as I work on the deflector dish...
-
Heavy Metal Spike

- Knight of the Round Bench
- Posts: 13627
- Joined: August 2nd, 2005, 2:07 am
- Location: Vancouver, Canada (ex-pat UK - Birmingham & Scotland!)
Re: Now … Voyager…
.
They say a picture paints a thousand words (well -Telly Savalas did anyways) . . . let's just go with "Pym particles".
. . . . . . . . . .
.
They say a picture paints a thousand words (well -Telly Savalas did anyways) . . . let's just go with "Pym particles".
. . . . . . . . . .
.
.
.
. . . . . . . . . . . . . . . . .
.
.
.
. . . . . . . . . . . . . . . . .
.
.
-
tay666
- Site Admin
- Posts: 19126
- Joined: December 8th, 2003, 11:20 am
- Location: Conneaut Ohio
- Contact:
Re: Now … Voyager…
Damn, that stuff is tiny 
I would loose most of those pieces.
I would loose most of those pieces.
Trevor Ylisaari
Check out My Prehistoric Scenes site and forum
"Nothing like a trail of blood
To find your way back home."
WANTED - Bat Rider - produced by Wraiths
Check out My Prehistoric Scenes site and forum
"Nothing like a trail of blood
To find your way back home."
WANTED - Bat Rider - produced by Wraiths
-
Splash-Art
- Seam Filler
- Posts: 319
- Joined: October 24th, 2012, 4:57 pm
- Location: Scottsdale, AZ
- Contact:
Re: Now … Voyager…
Outstanding work! Don't think I could handle the extreme tiny parts. I agree with tay666, I'd loose them or crush them !
-
Trekkriffic
- Master of Masking
- Posts: 964
- Joined: April 18th, 2014, 10:15 pm
Re: Now … Voyager…
Way behind on postings. Lots going on. Picking up where we left off... I'll be bouncing around so hold on tight...
New flattened profile after more plastic and putty work on the fantail:

USS Voyager WIP Img - 179 by Steve J, on Flickr
New fantail window framing for a more recessed appearance:

USS Voyager WIP Img - 180 by Steve J, on Flickr
He bounces...
In order for the shuttle bay to fit and sit level, I had to remove a layer of plastic from the hull
underneath the back section of the floor where it makes a left turn:

USS Voyager WIP Img - 181 by Steve J, on Flickr
I made this necessary when I added a thin piece of sheet sytrene under the rear section of the floor to stiffen it as the
printing material was so thin and soft. The hobby"dremel" made this a lot faster then it would have been otherwise.
Care had to be taken not to grind away too much and make a hole in the slot I was carving:
USS Voyager WIP Img - 181 by Steve J, on Flickr
Successful test fit of the new printed bay:

USS Voyager WIP Img - 182 by Steve J, on Flickr
The kit had a much shorter recess tailored to fit the parts in the kit which were much shorter. Only a thin layer of hull plastic remains as you can see here, i confess I went thru in a few spots but only just barely and no wires were damaged inside the hull:

USS Voyager WIP Img - 183 by Steve J, on Flickr
Test fitting shuttle bay to the modified hull slot I had to carve out atop the fantail:

USS Voyager WIP Img - 184 by Steve J, on Flickr
He bounces...
Light blocking of fore and aft photon torpedo ports:

USS Voyager WIP Img - 187 by Steve J, on Flickr
He bounces again...
Shuttle bay and roof parts airbrushed color "J" per the model makers painting instructions. This is a 50/50 mix of grey and light grey enamels:

USS Voyager WIP Img - 188 by Steve J, on Flickr
The slot I carved in the hull to accommodate the floor of the shuttle bay was sanded and filled with white acrylic putty to smooth out the divots:

USS Voyager WIP Img - 195 by Steve J, on Flickr
Stand by for another fantastic update tomorrow...
New flattened profile after more plastic and putty work on the fantail:
USS Voyager WIP Img - 179 by Steve J, on Flickr
New fantail window framing for a more recessed appearance:
USS Voyager WIP Img - 180 by Steve J, on Flickr
He bounces...
In order for the shuttle bay to fit and sit level, I had to remove a layer of plastic from the hull
underneath the back section of the floor where it makes a left turn:
USS Voyager WIP Img - 181 by Steve J, on Flickr
I made this necessary when I added a thin piece of sheet sytrene under the rear section of the floor to stiffen it as the
printing material was so thin and soft. The hobby"dremel" made this a lot faster then it would have been otherwise.
Care had to be taken not to grind away too much and make a hole in the slot I was carving:
USS Voyager WIP Img - 181 by Steve J, on Flickr
Successful test fit of the new printed bay:
USS Voyager WIP Img - 182 by Steve J, on Flickr
The kit had a much shorter recess tailored to fit the parts in the kit which were much shorter. Only a thin layer of hull plastic remains as you can see here, i confess I went thru in a few spots but only just barely and no wires were damaged inside the hull:
USS Voyager WIP Img - 183 by Steve J, on Flickr
Test fitting shuttle bay to the modified hull slot I had to carve out atop the fantail:
USS Voyager WIP Img - 184 by Steve J, on Flickr
He bounces...
Light blocking of fore and aft photon torpedo ports:
USS Voyager WIP Img - 187 by Steve J, on Flickr
He bounces again...
Shuttle bay and roof parts airbrushed color "J" per the model makers painting instructions. This is a 50/50 mix of grey and light grey enamels:
USS Voyager WIP Img - 188 by Steve J, on Flickr
The slot I carved in the hull to accommodate the floor of the shuttle bay was sanded and filled with white acrylic putty to smooth out the divots:
USS Voyager WIP Img - 195 by Steve J, on Flickr
Stand by for another fantastic update tomorrow...
-
Trekkriffic
- Master of Masking
- Posts: 964
- Joined: April 18th, 2014, 10:15 pm
Re: Now … Voyager…
Darting here and there...
Reworked deep rear window and squared up fantail before cleanup. Shuttle bay test fitting:

USS Voyager WIP Img - 199 by Steve J, on Flickr
Shuttle bay test fit. Fantail masked to protect fiber for lights:

USS Voyager WIP Img - 200 by Steve J, on Flickr
Fantail inserted into rear of secondary hull. No glue yet:

USS Voyager WIP Img - 202 by Steve J, on Flickr
The roof was prone to bending so I reinforced it using a piece of leftover Paragrafix brass photo-etch.
It was just about the perfect shape to fit the length of the ceiling light slot now covered by a piece of sanded clear styrene.
The roof can still be bent if needed but it's much more rigid than before and will not be prone to sagging especially if exposed to heat:

USS Voyager WIP Img - 203 by Steve J, on Flickr
Deflector dish test fitting into hull and taping for measurements. Ventral secondary hull strobe LED with fiber glued in place:

USS Voyager WIP Img - 207 by Steve J, on Flickr
I needed to protect the belly strobe fiber optic strand from being broken off during the next phase of work.
So I cut a short piece of Evergreen tubing to form a round wall around the fiber.
Tamiya tape holds the fiber "shield wall" in place:

USS Voyager WIP Img - 208 by Steve J, on Flickr
Back wall of deflector reflector housing has a blue 3 mm wide LED tape strip centered vertically and horizontally for illuminating the back of the clear (sanded) dish:

USS Voyager WIP Img - 210 by Steve J, on Flickr
Deflector dish held up against the deflector housing and lit by a blue LED strip.
This is before I add the diffusion discs of thin styrofoam sheet and a disc of clear blue styrene.
This is also before I made the ribs around the perimeter opaque using strips of white decal paper painted with orange-brown enamel:

USS Voyager WIP Img - 211 by Steve J, on Flickr
I brushed this adhesive onto each rib on the clear deflector dish using a "superfine" microbrush.
Then I placed a small orange-brown strip made of white decal material carefully onto the rib using tweezers before burnishing with a cotton swab:

USS Voyager WIP Img - 212 by Steve J, on Flickr
After adding thin decal strips to each rib but before I clean up the tips, do some paint detailing with a fine tipped brush, or finish the center ring using more of the orange-brown decal material.
The very center will either be painted or covered with a disc of white decal:

USS Voyager WIP Img - 214 by Steve J, on Flickr
Next up... more light tests.
Reworked deep rear window and squared up fantail before cleanup. Shuttle bay test fitting:
USS Voyager WIP Img - 199 by Steve J, on Flickr
Shuttle bay test fit. Fantail masked to protect fiber for lights:
USS Voyager WIP Img - 200 by Steve J, on Flickr
Fantail inserted into rear of secondary hull. No glue yet:
USS Voyager WIP Img - 202 by Steve J, on Flickr
The roof was prone to bending so I reinforced it using a piece of leftover Paragrafix brass photo-etch.
It was just about the perfect shape to fit the length of the ceiling light slot now covered by a piece of sanded clear styrene.
The roof can still be bent if needed but it's much more rigid than before and will not be prone to sagging especially if exposed to heat:
USS Voyager WIP Img - 203 by Steve J, on Flickr
Deflector dish test fitting into hull and taping for measurements. Ventral secondary hull strobe LED with fiber glued in place:
USS Voyager WIP Img - 207 by Steve J, on Flickr
I needed to protect the belly strobe fiber optic strand from being broken off during the next phase of work.
So I cut a short piece of Evergreen tubing to form a round wall around the fiber.
Tamiya tape holds the fiber "shield wall" in place:
USS Voyager WIP Img - 208 by Steve J, on Flickr
Back wall of deflector reflector housing has a blue 3 mm wide LED tape strip centered vertically and horizontally for illuminating the back of the clear (sanded) dish:
USS Voyager WIP Img - 210 by Steve J, on Flickr
Deflector dish held up against the deflector housing and lit by a blue LED strip.
This is before I add the diffusion discs of thin styrofoam sheet and a disc of clear blue styrene.
This is also before I made the ribs around the perimeter opaque using strips of white decal paper painted with orange-brown enamel:
USS Voyager WIP Img - 211 by Steve J, on Flickr
I brushed this adhesive onto each rib on the clear deflector dish using a "superfine" microbrush.
Then I placed a small orange-brown strip made of white decal material carefully onto the rib using tweezers before burnishing with a cotton swab:
USS Voyager WIP Img - 212 by Steve J, on Flickr
After adding thin decal strips to each rib but before I clean up the tips, do some paint detailing with a fine tipped brush, or finish the center ring using more of the orange-brown decal material.
The very center will either be painted or covered with a disc of white decal:
USS Voyager WIP Img - 214 by Steve J, on Flickr
Next up... more light tests.